Blogs
Five tips for getting the perfect over-under photo

The over-under or split shot, where in a single image the photographer has managed to photograph something underwater while also capturing what’s happening above the water, is a real crowd pleaser. These types of photos look incredibly difficult to do, but actually they are quite simple if you follow a few simple steps.
5. Large Dome Port
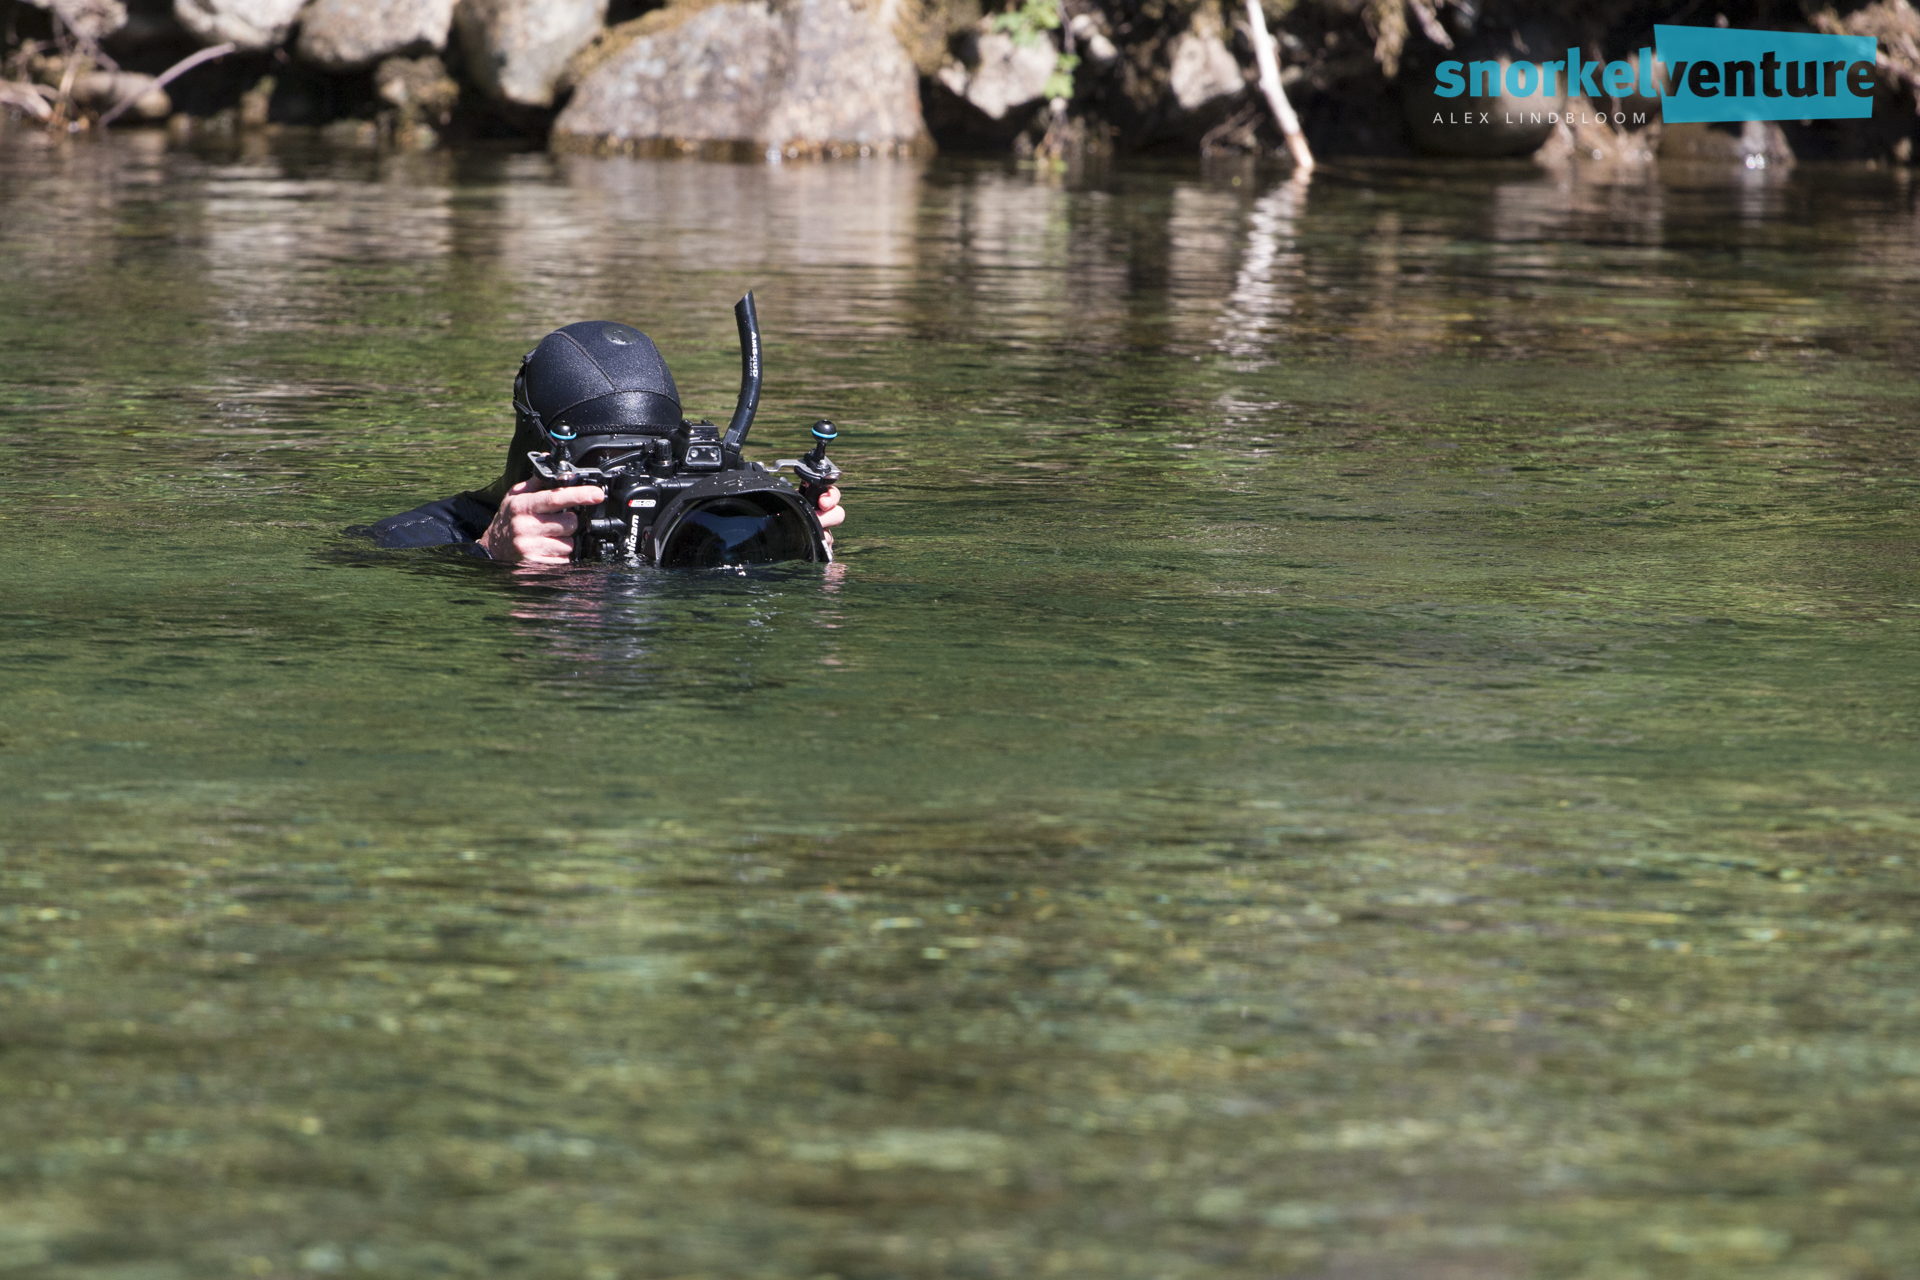

In order to capture what’s going on above and below the water we not only need a wide angle lens, but also a larger dome port to provide maximum surface area were we can really split that water line. If you are using a smaller compact camera where the lens surface areas is about an inch in diameter the chances of capturing a split shot are not very good. However, if are using a camera housing that allows for a larger dome port than you just need to follow the next steps.
4. Shallow Subject

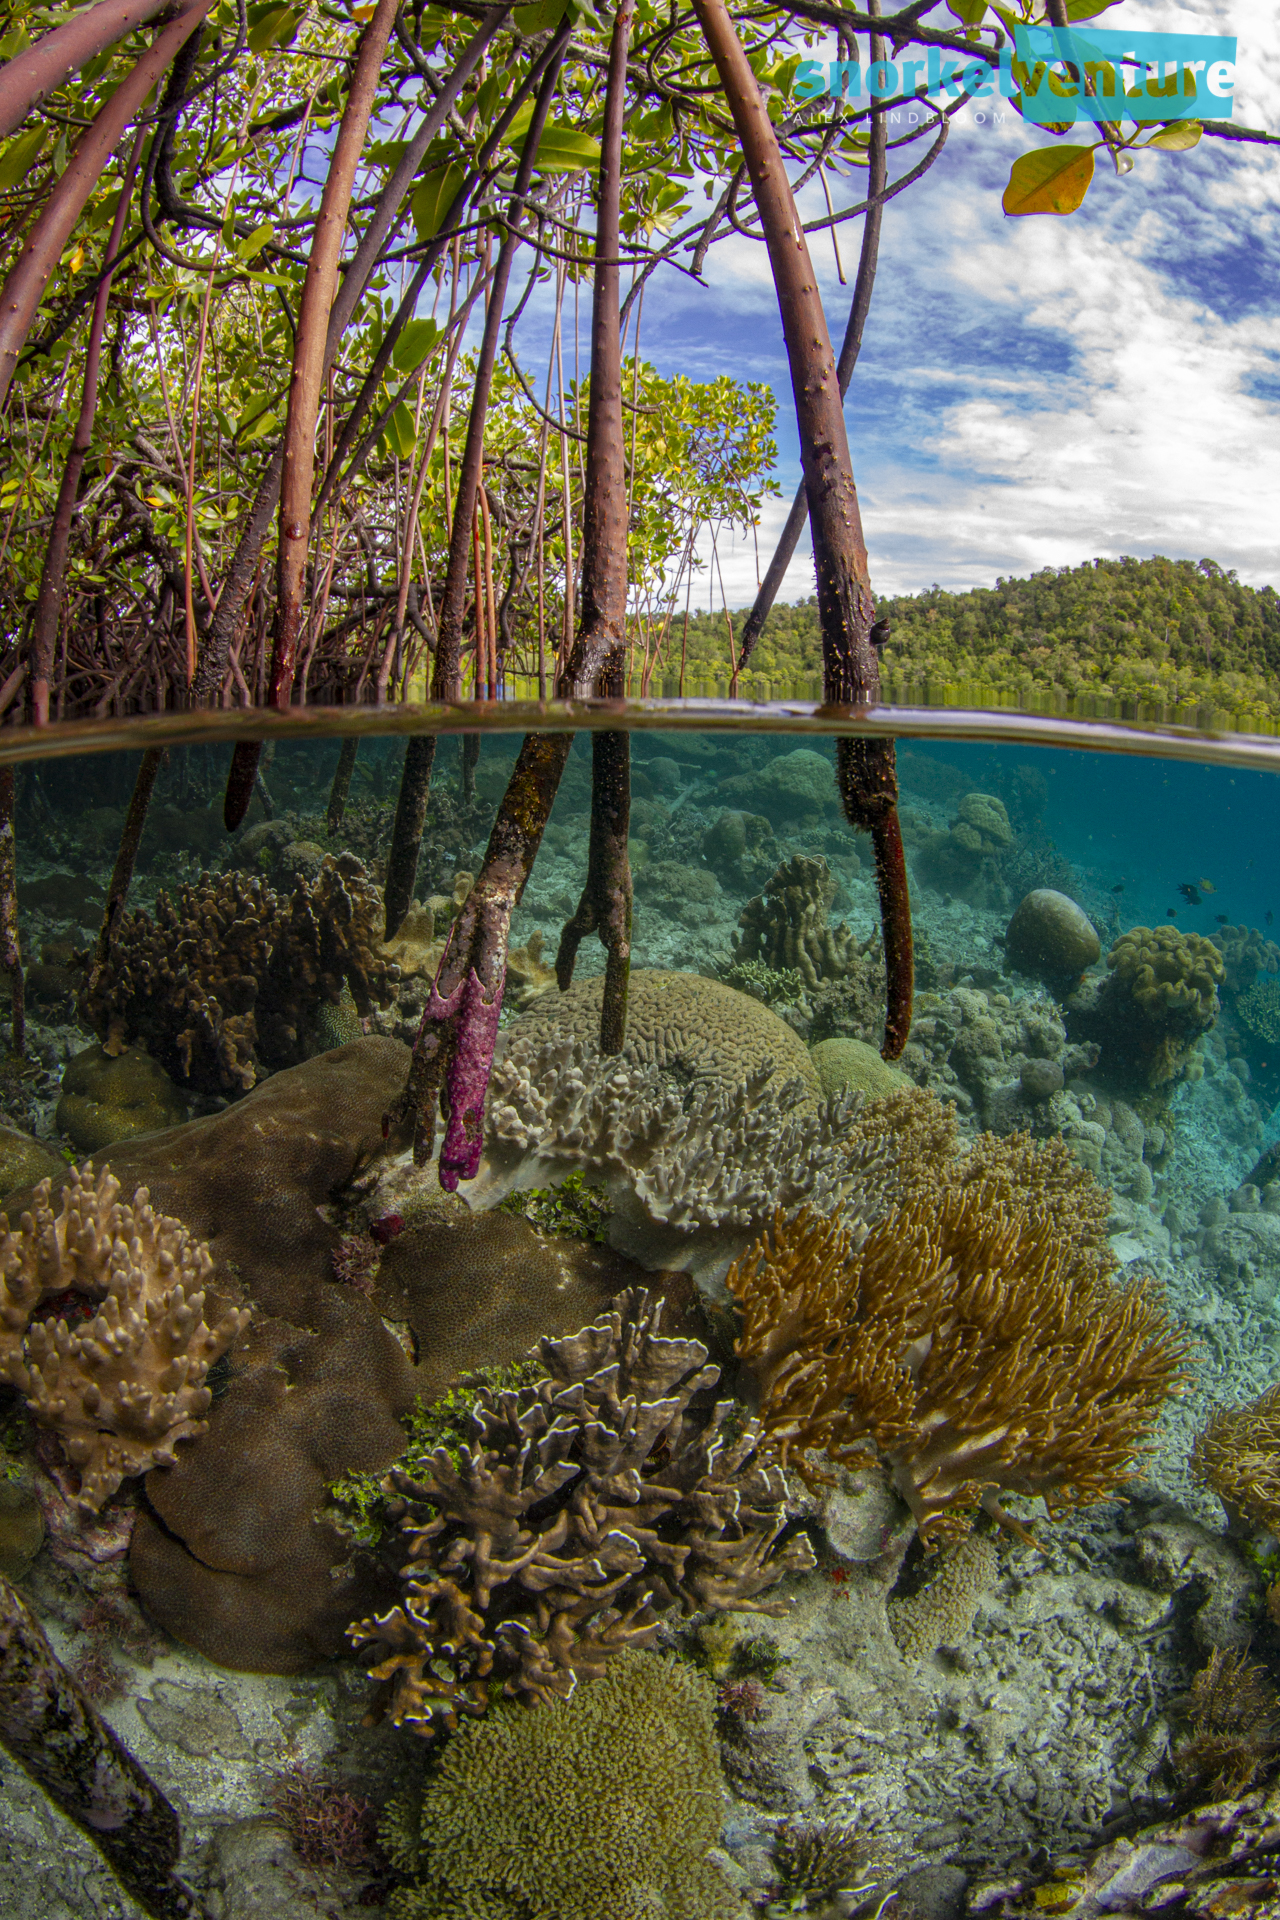
The best results will be when you have a subject in shallow shallow water, anywhere from a few inches in depth to a couple feet. Anything deeper than four feet or so makes it difficult to capture the subject in nice natural light to bring out the colors, but also make it difficult to include both the topside and underwater subject in the same frame.
3. Natural Light

Light is key for this type of photo as we rapidly run short of light underwater, even in just a few feet. If we want to have balanced light throughout the photo where the topside and underwater subject share a similar exposure, we need a nice sunny day and also to remember to keep the sun behind us. If we start facing into the sun or shooting too early in the day or too late in the afternoon where the light is fading our exposure through the frame won’t match leaving us with a blown out landscape or a very dark underwater subject. Bright light in shallow water is best.
2. Water Line
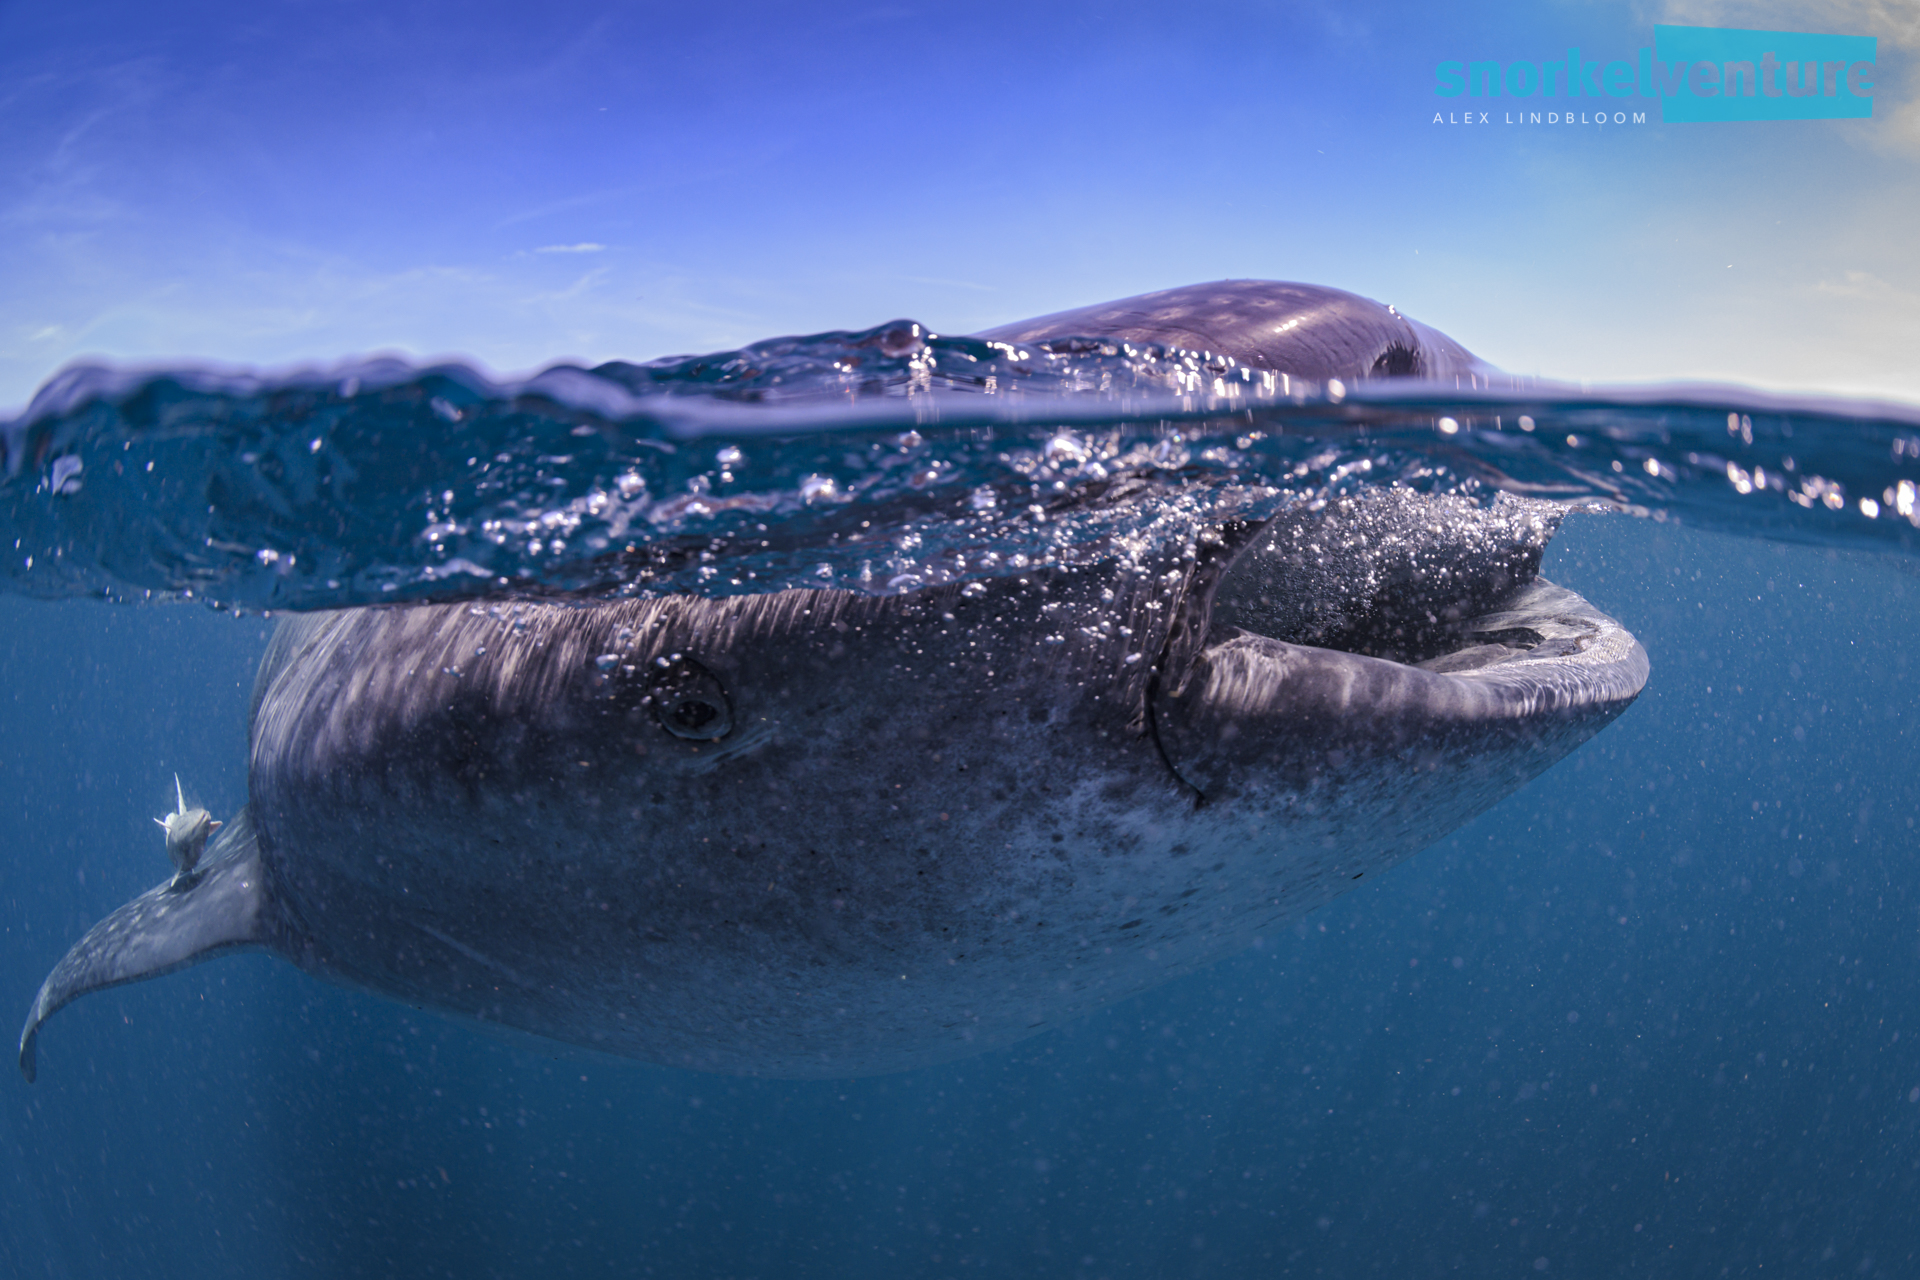
Aside from what you choose to include in the photos, getting the water line just right is one of the pieces of the image which will either make or break it. As the underwater subject will general be the stronger of the two subjects I try to favor it by giving it a bit more space in the frame. If you look at most over under shots you’ll see that roughly two-thirds of the frame are underwater, with the remaining third above water. Something else to consider with the water line is weather you want it to be a smooth water line or a bit wavy, a lot of this will depend on the surface conditions of course, but you can experiment a bit with this for some varied results of the same subjects. Also, something really important to note is that the longer you leave the lens/port out of the water, the more water droplets will form. For best results, have your camera submerged until you’re ready to take the shot (have the composition already planned in your head) and then quickly but smoothly bring it out of the water until you have the composition you intended, and click the shutter. This whole process should take not much longer than a couple seconds. The final thing I’d like to add is that a healthy amount of spit spread over the lens and then rinsed off will keep water droplets from building up on your drying port.
1. Subject Selection

Subject selection is paramount here as we are now selecting two subjects which can be combined in a similar image. Many times I’ll find a fantastic shallow reefscape that would be ideal for including in a split shot, but then there’s nothing to include in the above portion. While I think it’s usually best to have both an interesting above water and underwater subject, there is a way to still get an interesting split shot with no above ground subject. If there is just nothing to include above the water, you can try to make an interesting water line by rocking the camera forward and back while still keeping it half submerged as I press the shutter. This way you’ll have a bit of blue sky and clouds, some turbulent water washing across the lens, and then a brilliant reefscape below.